


For general feedback about the game.
Steam SupportVisit the support site for any issues you may be having with the game or Steam.
The first step of any map-making process at Valve starts with figuring out what the TF2 community would most like to play. The idea for "Gorge", for instance, came from a brainstorming session to see if we could develop an alternative to the standard Attack/Defense map. The competitive community typically avoids Attack/Defense maps for several reasons, one of which is their potentially long time limits. We thought that was an interesting variable to dig into - could we develop a shorter-form Attack/Defense map? The community overall had also been asking us to make more five-point CP maps, so we thought there was an opportunity to try out a short Attack/Defense map that could then be turned into a five-point CP map via mirroring down the road.
With the goal in place, the next place we turn to is a simple pad of paper, where we start scribbling down ideas.
The Scribble
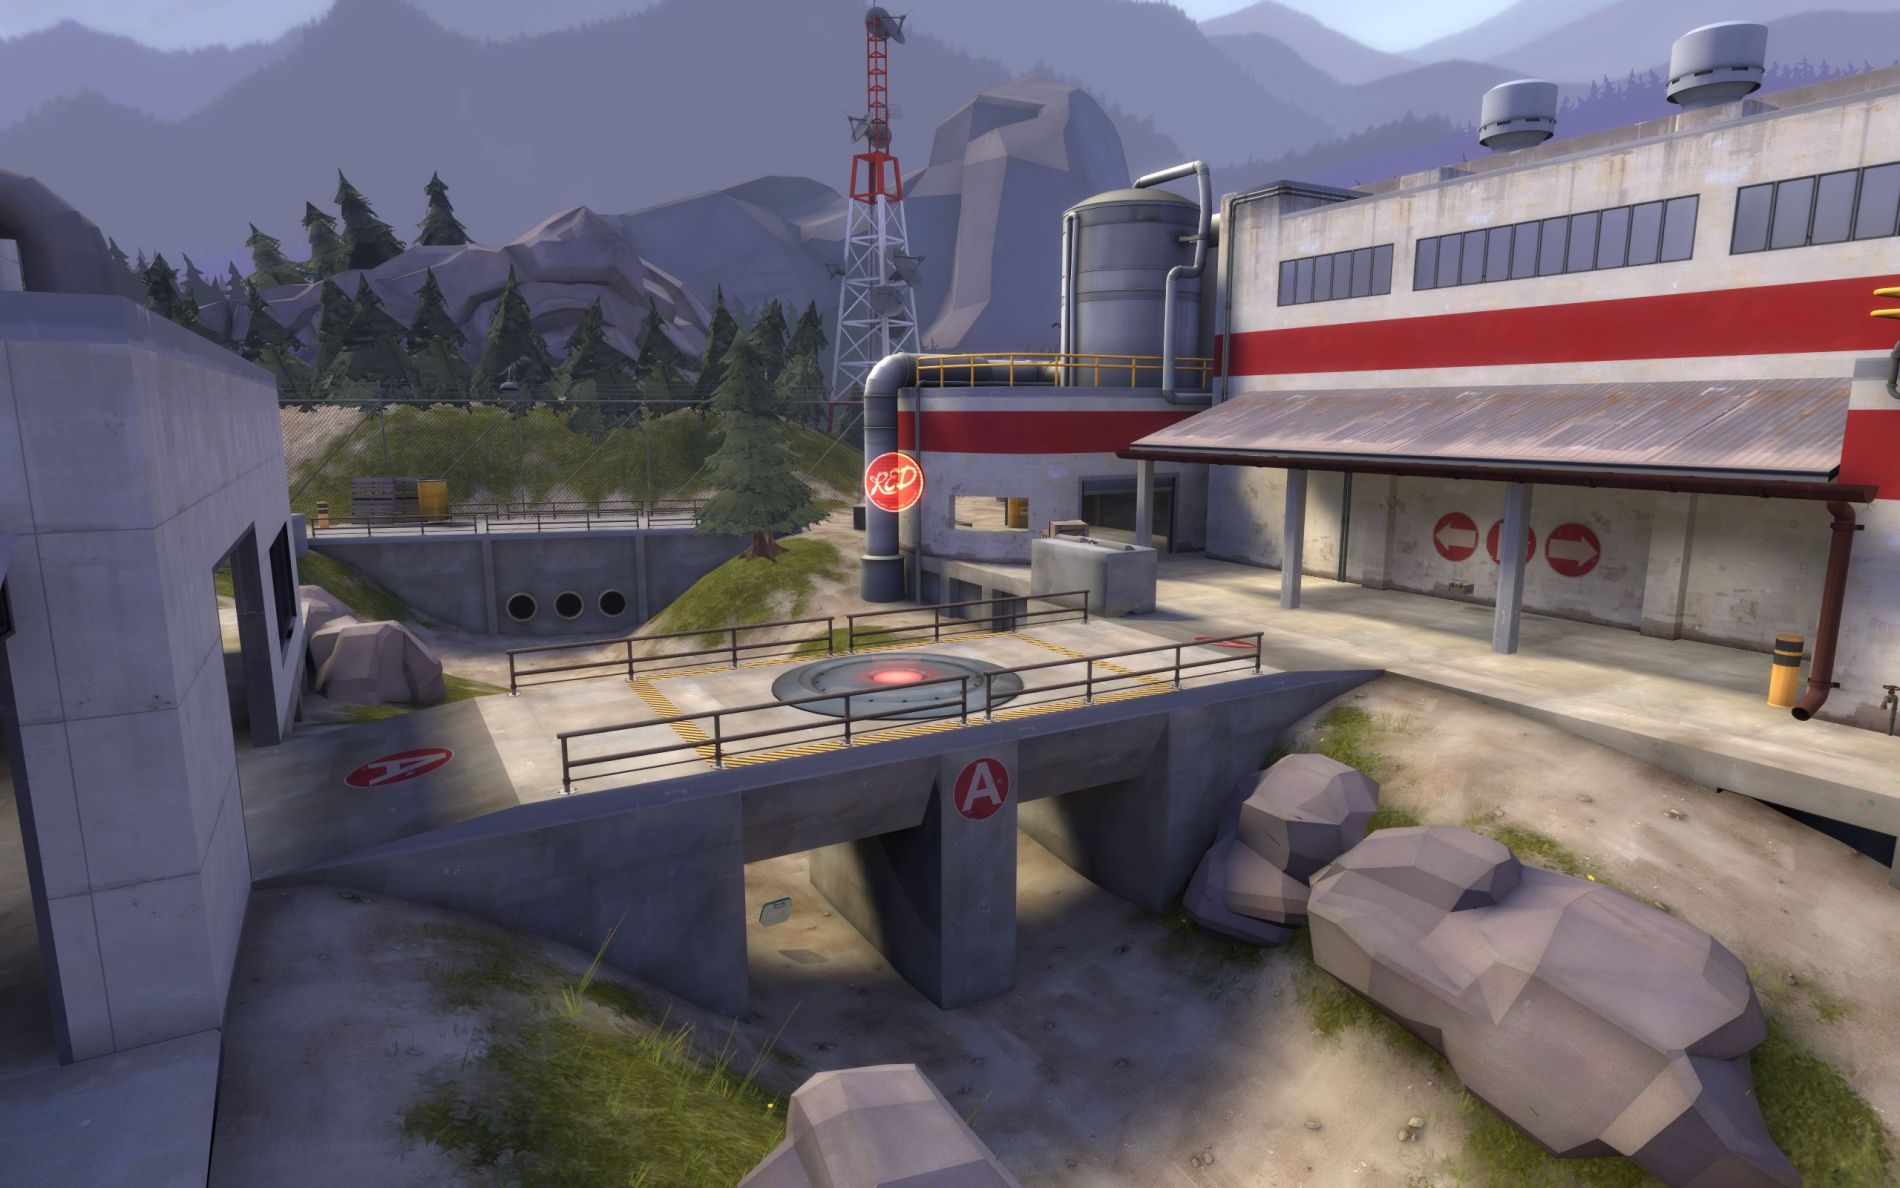
The original concept for "Gorge" was that it would only have two points - essentially a single stage separated by a gorge running through the middle of it and connected by a bridge. Two key structures on either side of the gorge would house the points. We knew that we wanted to have trucks and containers as decoration, to suggest a shipping and receiving point for a weapons manufacturing factory.

The Combat
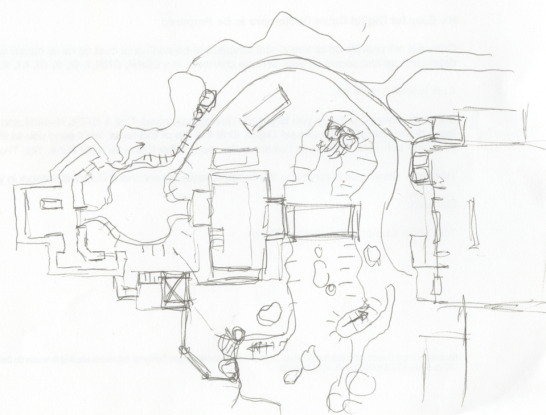
At this point all we had was the goal (short-form Attack/Defense map), a rough theme (weapons factory) and a basic layout of the gorge idea. As we started developing the scribbles into a working map, though, other requirements to make the map a better playable experience started to suggest themselves. One of the first scribbly drawings shown below suggested one large contiguous space, for instance, with some loosely established broad stroke structures to give it a sense of scale. Building out the map from the drawing, though, we realized we didn't have any clearly defined combat spaces. The map needed to be segmented a little more deliberately.
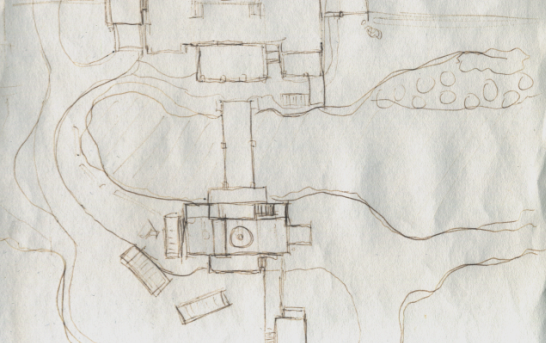
This second drawing shows some early concepts at a bigger building that created more of a combat arena for players.
We also started fleshing out some of the routes the player could take, with three exits from the spawning area at the front, left and right that opened onto a basketball-sized court. At this point we also started playing with the idea of an elevated bridge, similar to the covered bridge from Granary, with its sneaky upper route that players could drop down from.
The Playtesting
At Valve, we playtest iteratively and often. After we'd built a rough but playable Hammer map of "Gorge", we playtested it as a group, then met afterwards to discuss it. What worked? What didn't? After playtesting "Gorge", it became immediately apparent that a lot of the elements we thought would be interesting at concept stage simply weren't all that great in execution. At this stage, we'll commit to small iterative changes, play, discuss, and repeat. What would happen if we used more terrain? If we added a roadway? If we added a sweeping side route that could be used for flanking? By experimenting iteratively with every new idea, we're able to make demonstrable incremental improvements without slowing the team down on risky, time-consuming resets.
For example, one thing we realized after playtesting was that we needed to better define the purpose of the gorge in the map. Initially the gorge was deep, with steep walls and only one exit—sort of like a penalty box or a hazard—but that ended up being pretty dull. As we gradually discovered through iteration and playtesting, it was far more interesting from a player perspective to be able to flow through the space as a whole.
As we kept trying new ideas, the map started to take shape. Some vague ideas didn't work out so well. Others continued to grow almost like seeds.
The Cap
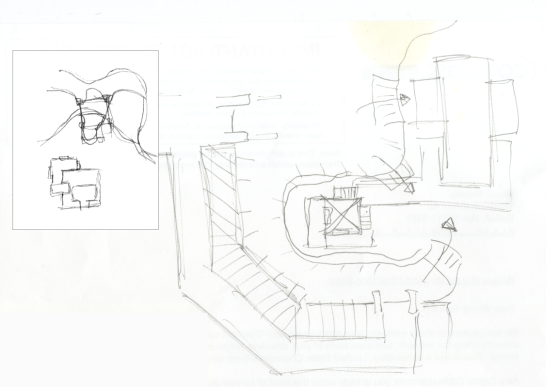
At first we didn't know much about the cap point. We had a rough scale and placement for it, but didn't know yet how it would affect the play experience. As we started developing the map, we started sketching cap ideas within the rough space we'd assigned for it.
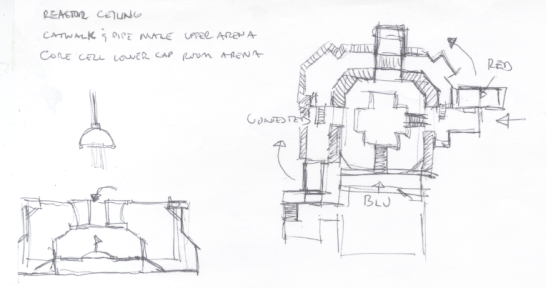
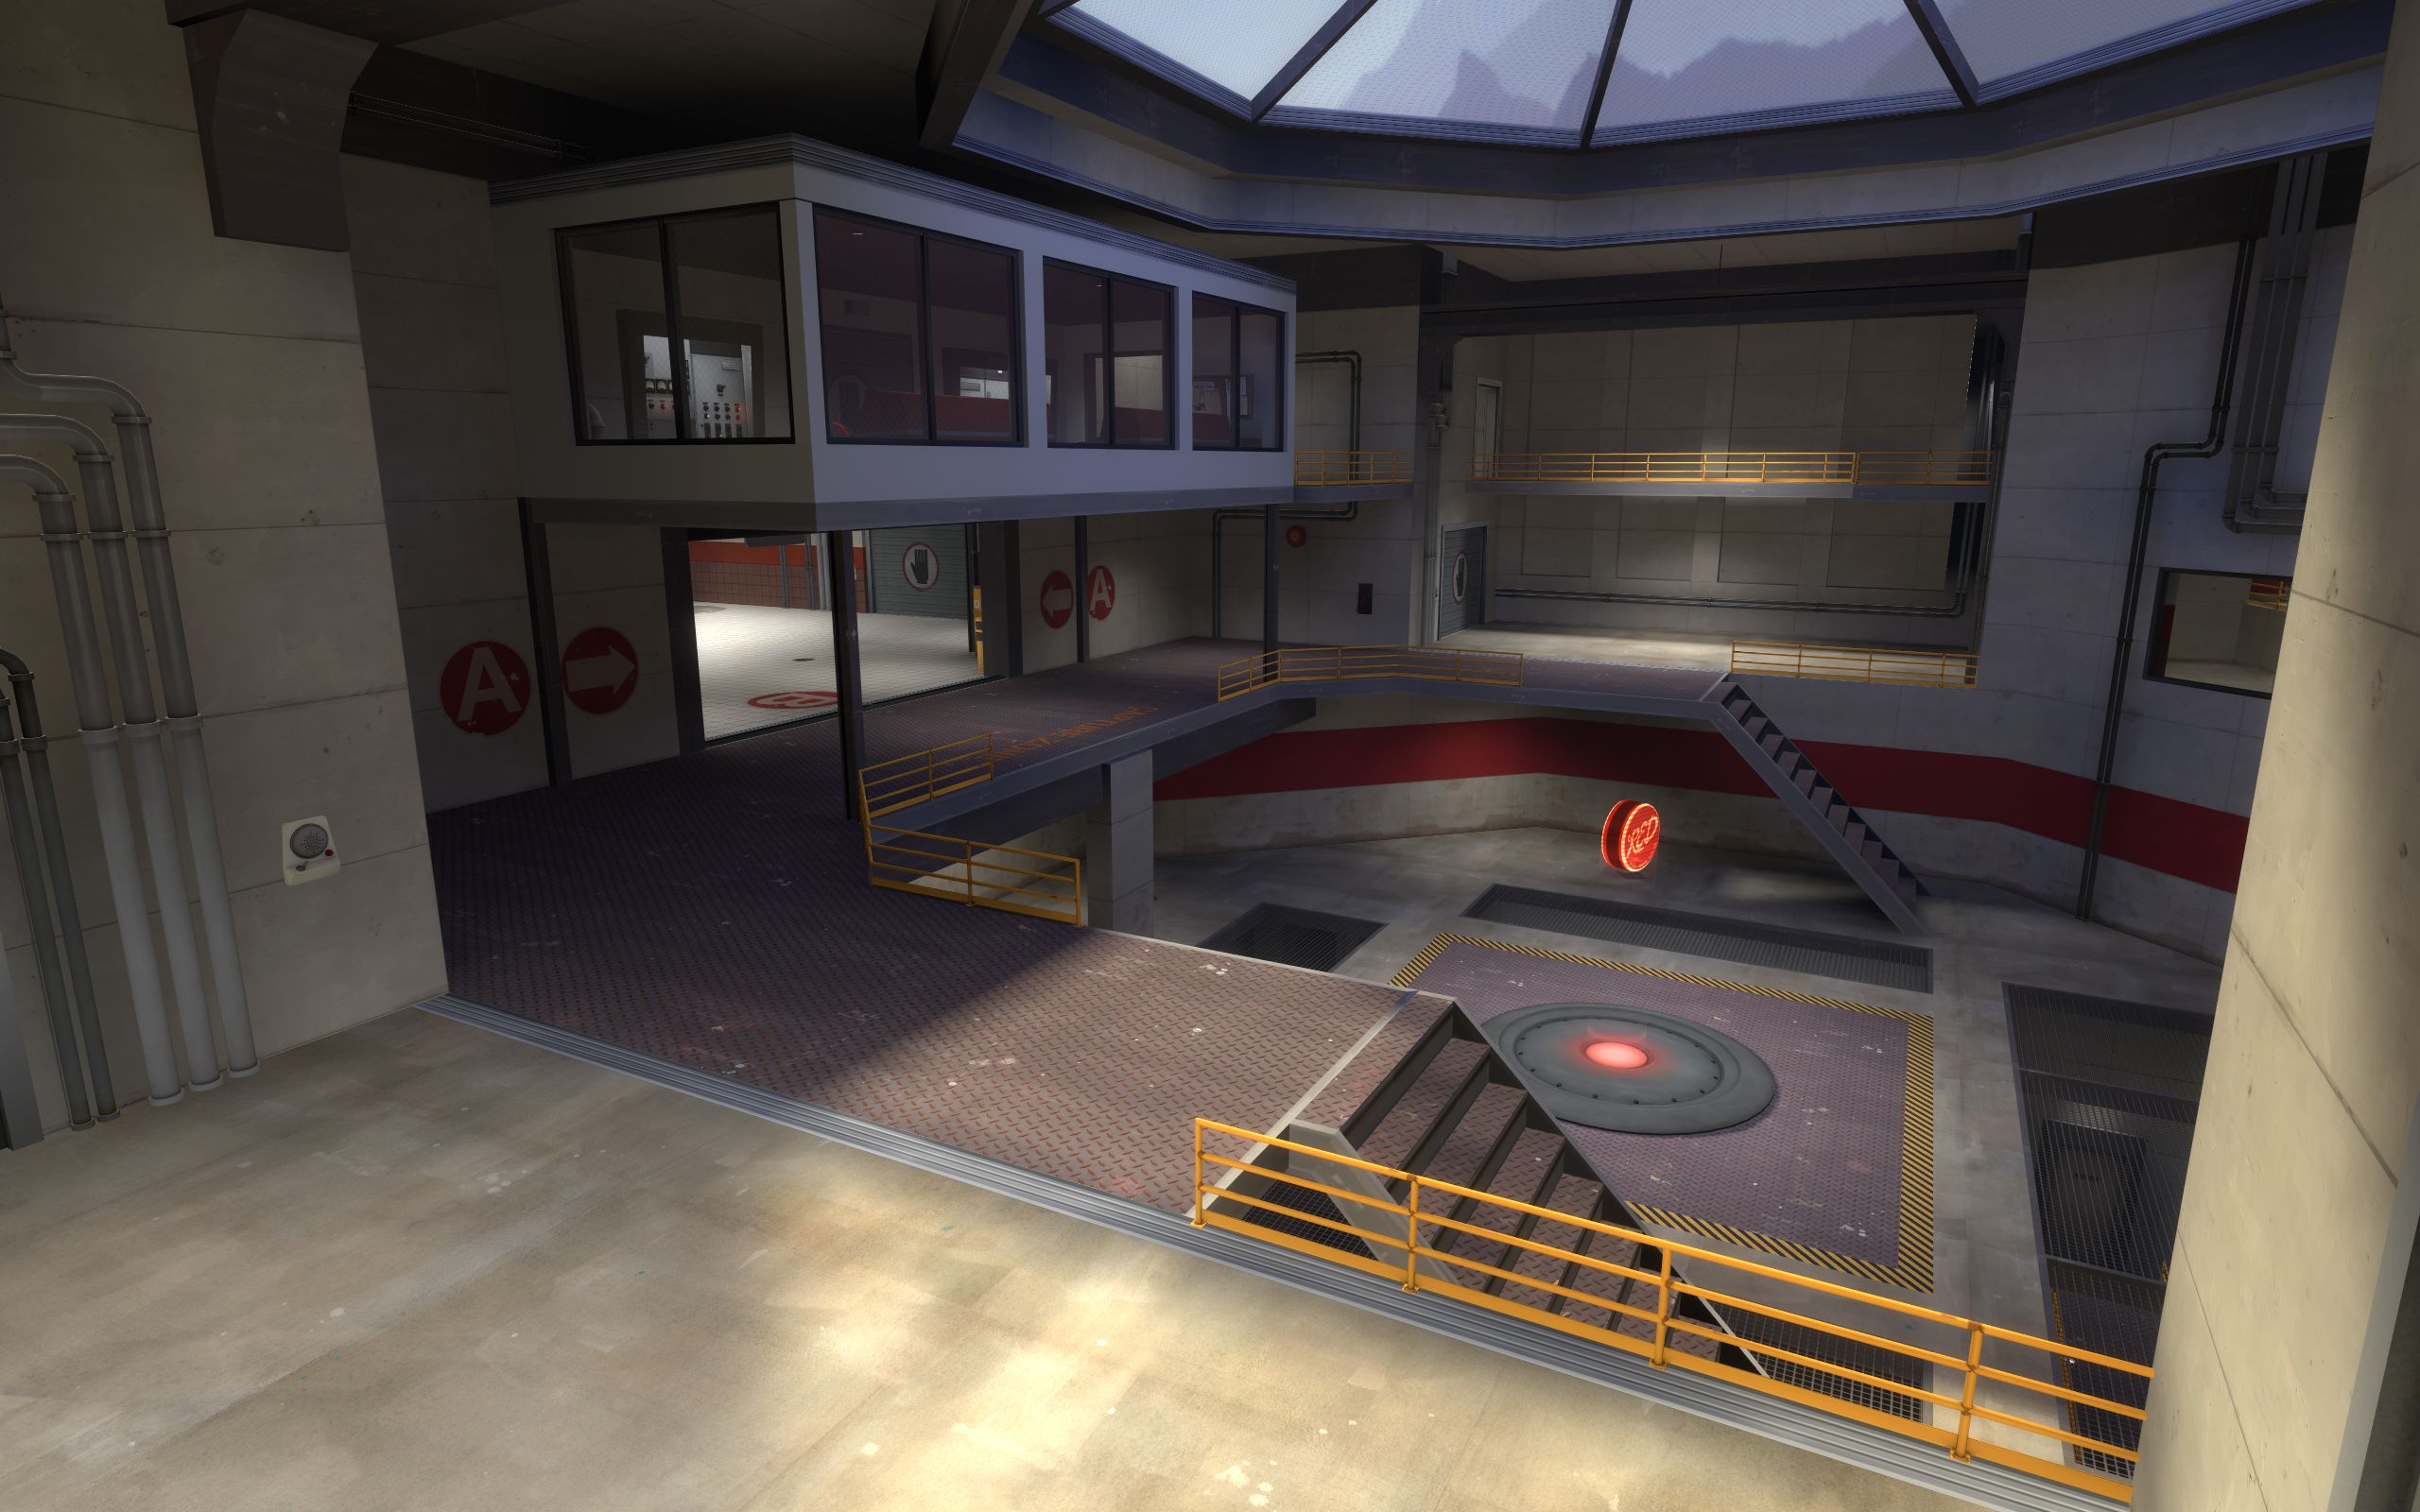
One question that kept nagging at us was: How could we limit line of sight? This would be the final cap point (that would later become the pit with the back flowing route). If the defender came out of spawn there would be stairs and BLU could attack from above. We needed upper- and mid-battle grounds.
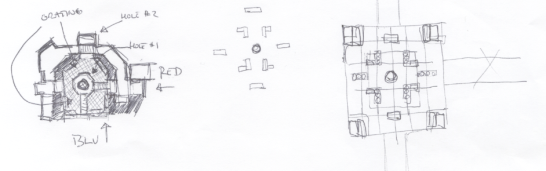
We also needed to determine whether the cap would be elevated or sunken. It started elevated, but after playtesting it became clear that a sunken pit worked better.
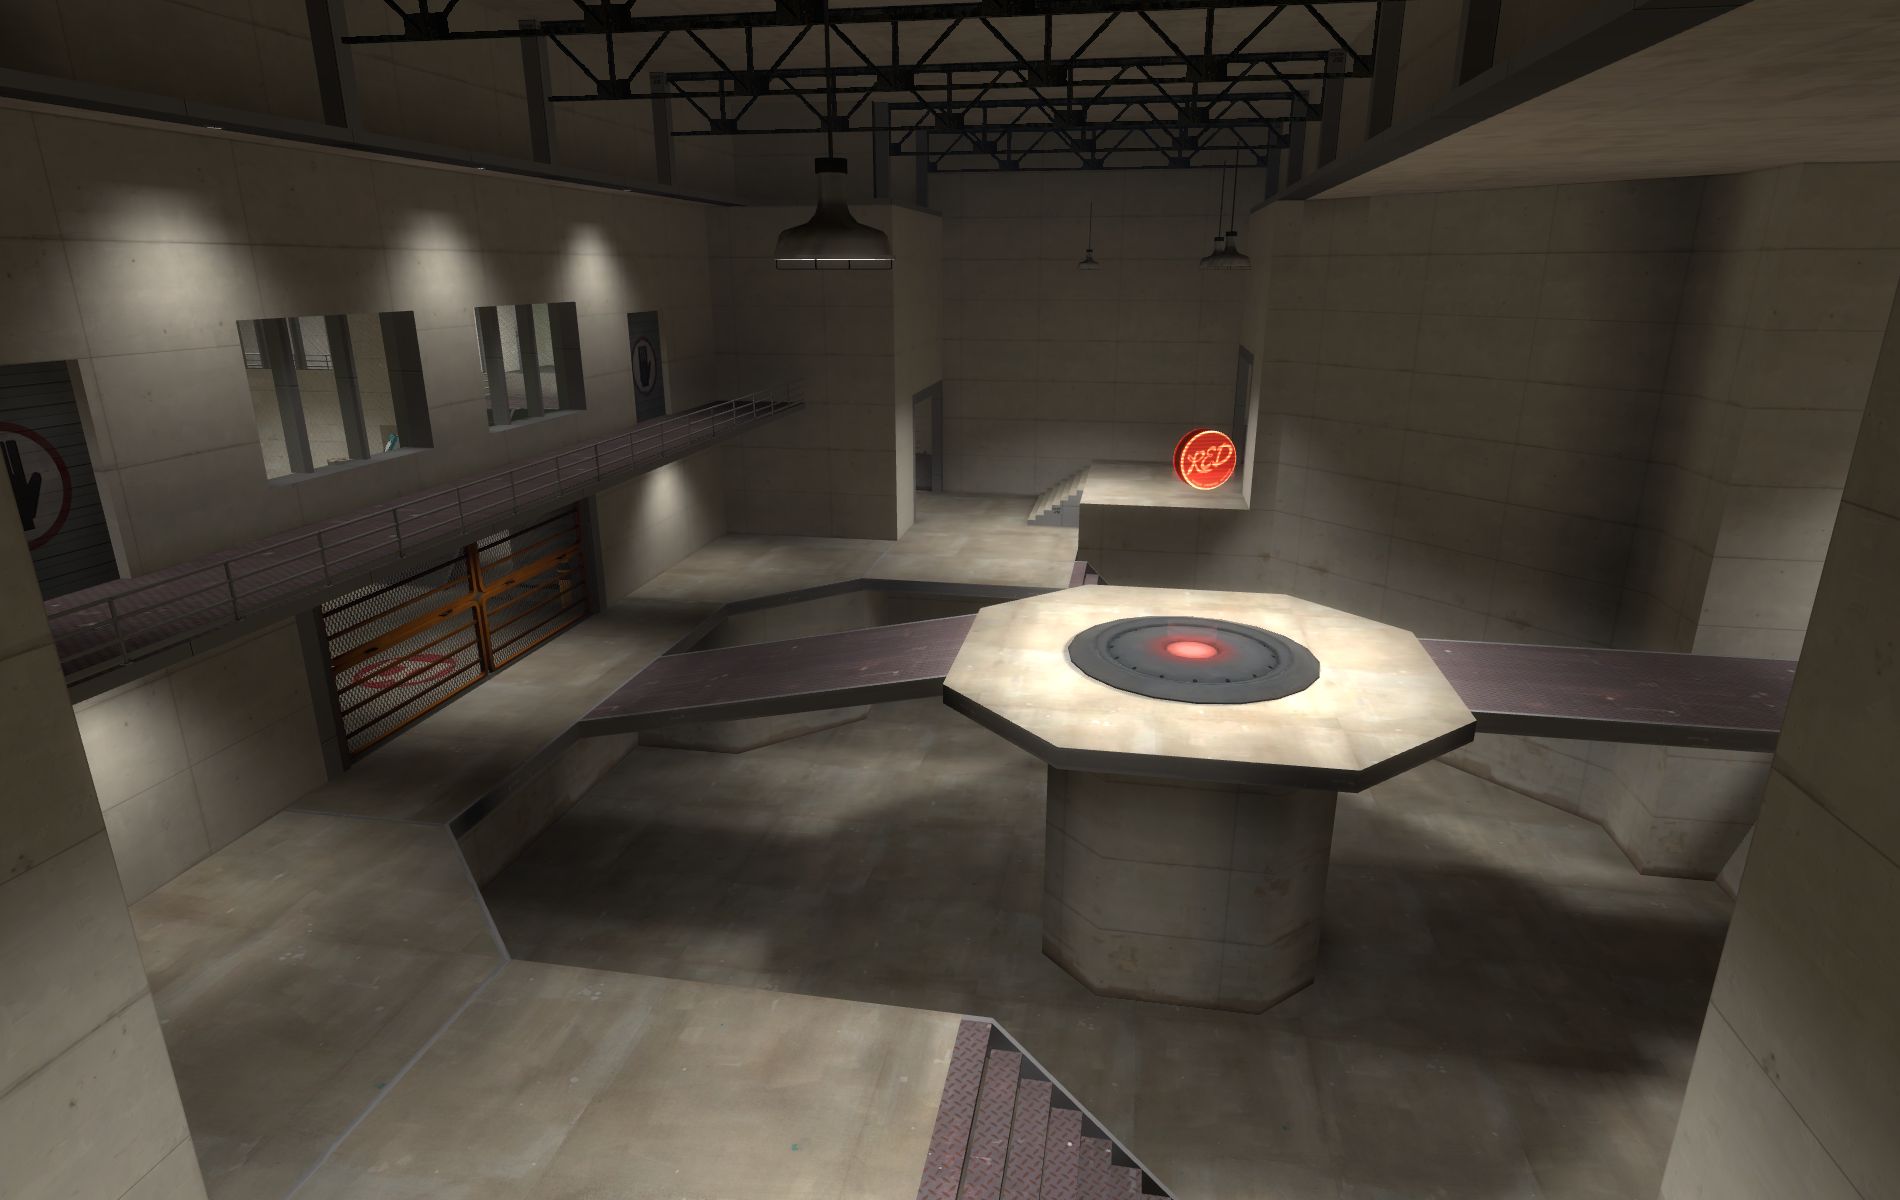
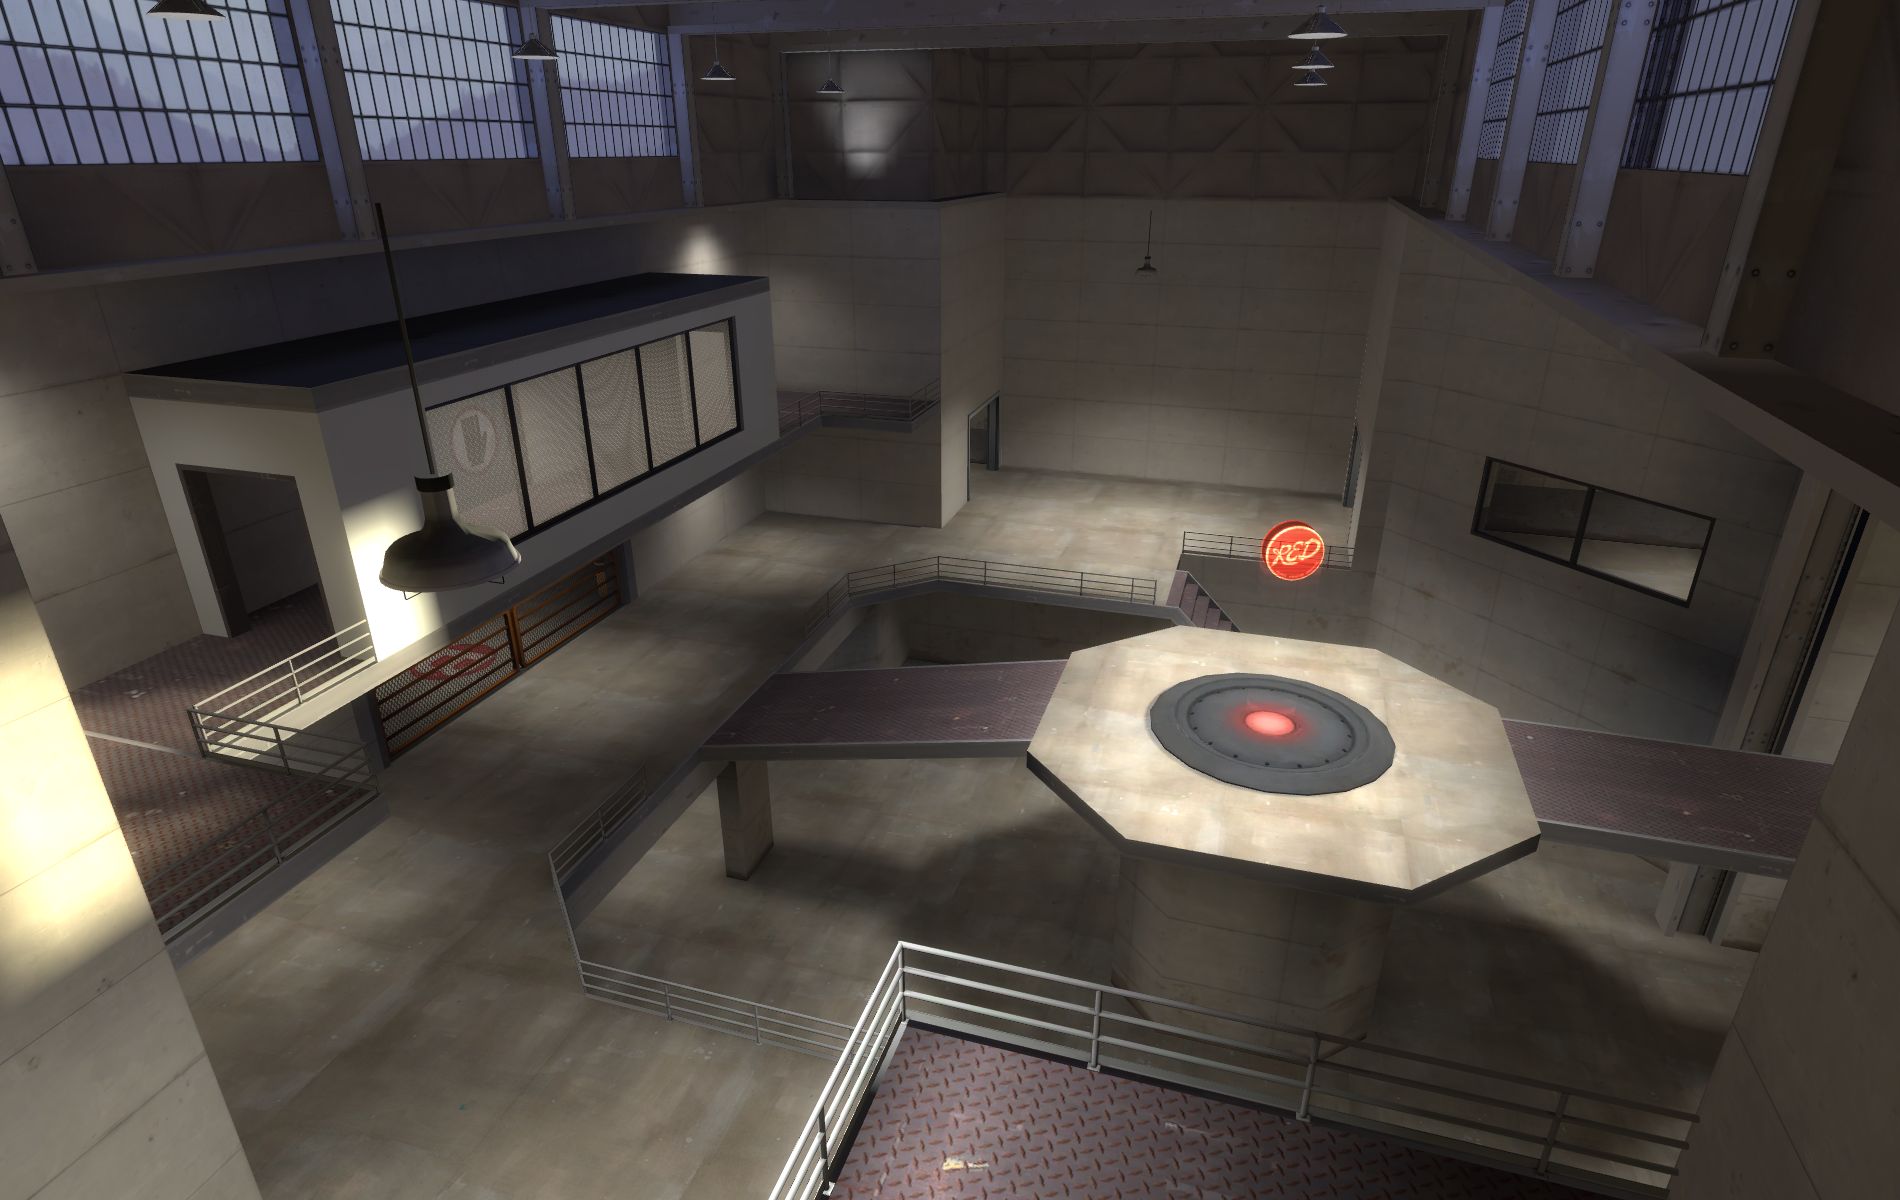
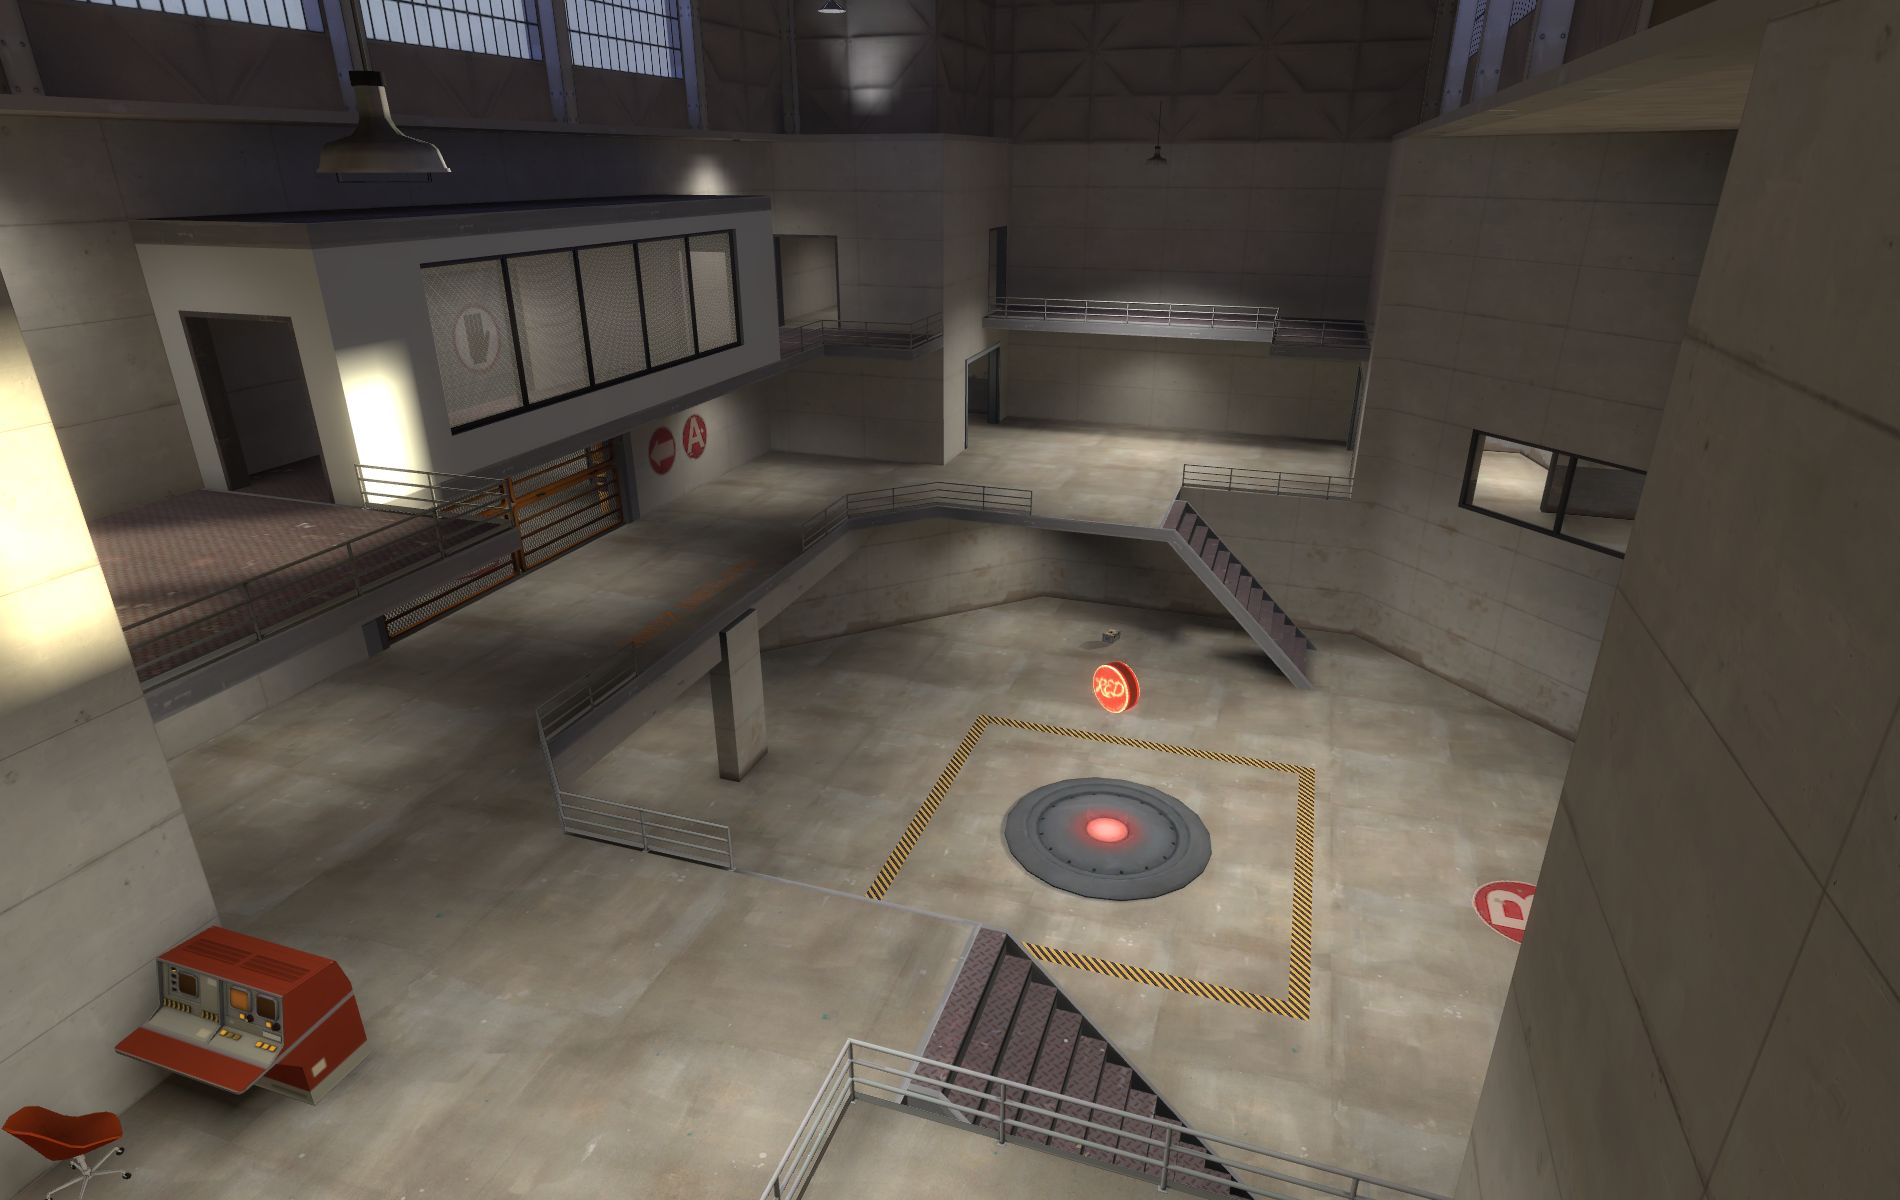
With players coming from both sides in a symmetrical map, the elevated point can often work better. But with "Gorge" being an asymmetrical map, there was something more interesting about everyone sort of dog-piling into that pit and slugging it out in there.
Once we were playtesting the hammer map on a regular basis, we reached a point where drawings stopped being all that useful. For me, drawings are a great place to start at a concept stage: Rough out the bones of an idea until you've got a working map in Hammer, then iterate from there. (It wasn't until we were inside the structures and needed to flesh out the interior spaces that we started drawing again.) There are many different approaches, of course, but working back and forth between the idea space and the execution space has always worked best for me. Start with a rough concept sketch; build the basic blocks in Hammer; take the idea to an evolved concept sketch; integrate the evolved sketch back into the map; then lots and lots of iteration and playtesting.
Want more? Check out our walkthrough of how "Viaduct" got made here.
